

Let customers check themselves in with a posted QR code
Create a self check-in QR code, choose Static or Dynamic, display it at your club, and set the payment and check-in-window rules customers meet.
Post a QR code at your club so customers check themselves in from their phones — no staff at the desk and no app to download. (About 10 minutes for the first QR. You need the club settings permission and, ideally, a tablet to display it.)
How self check-in works
You display a QR code at your club. A customer scans it with their phone camera, their browser opens the check-in page, and they check themselves in with one tap. It works for reservations, events, and programs the customer is on the roster for within the check-in window. Front-desk scanning and self check-in run the same rules, so the two never disagree.
Before you begin
- The club settings permission (you can open Settings).
- A device to display the QR: a tablet on a stand, a printed sign, or both.
- Optional but recommended: your club's waiver is set up, so waiver-required customers are prompted to sign.
Create a self check-in QR code
- Go to Admin → Settings → Check-in.
- In the Self check-in section, under Your QR codes, click Add QR code.
- Fill in the QR code:
- Internal label — for your reference only (for example Front desk or Court 3 entry). Customers don't see it.
- Title shown to customers — appears on the display and printable flyer (for example Self check-in).
- Check-in QR type — choose Dynamic QR or Static QR (see the next section).
- Click Create QR code.
New QR codes are Enabled by default. A disabled QR code can't be used for check-in.
Choose Static or Dynamic
| Type | What it is | Best for |
|---|---|---|
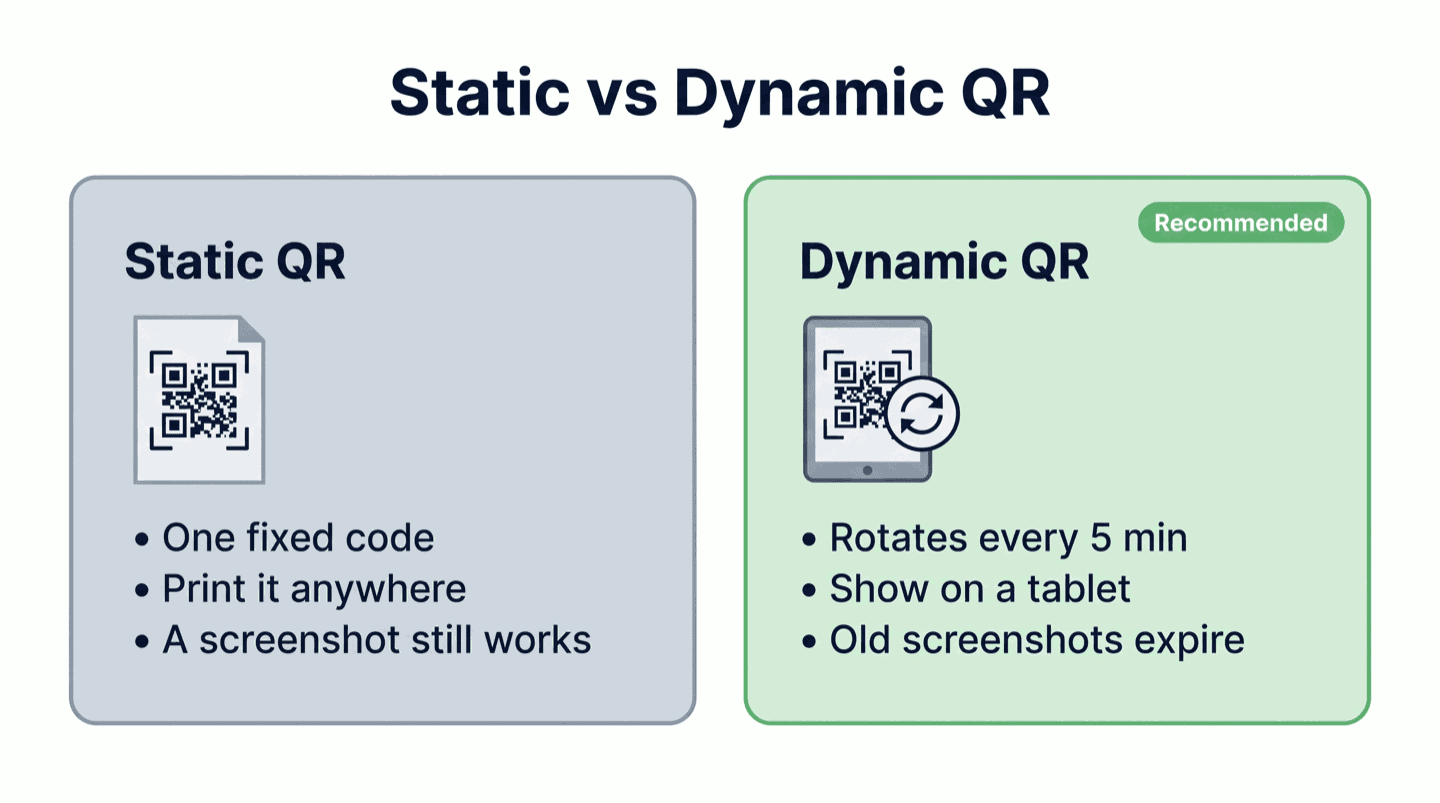
| Dynamic QR (Recommended) | The code rotates every few minutes on a tablet. An old screenshot expires, so a customer can't check in from home. | An iPad or wall display at the entrance where remote check-ins would be a problem. |
| Static QR | One permanent code that never changes. Print it or display it. | A poster at the desk, a sticker by the door, or a tablet you don't want to manage — anyone with a photo of it can scan it from anywhere. |
Display the QR code
- On the Check-in settings page, find your QR code under Your QR codes and click View.
- Under Deploy this kiosk (Dynamic) or Deploy this QR (Static), use the option that fits your setup:
- Open display — opens the full-screen display page. Run this on the tablet you're mounting.
- Copy the Display URL — paste it into the tablet's browser, then lock the browser to that page (on iPad, Guided Access keeps customers from navigating away).
- Download PNG or Printable PDF — for a Static QR you want to print on a poster or sticker.
Set the check-in window
Check-in window controls how many minutes before a booking starts a customer can check in. The window always closes when the booking ends. The default is 180 minutes (three hours). Change it on the Check-in settings page — enter a number of minutes and it saves when you click away.
For self check-in this is a hard limit — a customer can't check themselves in before the window opens. At the front desk it only governs the automatic behavior: staff can always check an early arrival in by hand.
Decide whether payment is required
Require payment before check-in is a switch on the Check-in settings page:
- On (Recommended) — self check-in refuses to check in customers with unpaid orders, including unpaid court fees on OpenGame bookings. A customer with a fee sees Pay to Check In and pays inline before they're checked in.
- Off — an unpaid booking still checks in. Turn this off only if you collect payment at the front desk.
What the customer experiences
When a customer scans your posted QR, their phone opens a page titled Check in at [your club]:
- If they're signed out, they see Sign in to check in (or Create an account for a first visit).
- Their eligible bookings appear under Your bookings, each with a Check in button. One tap checks them in.
- If a booking has an unpaid fee and payment is required, the button becomes Pay to Check In and they pay inline.
- If your club's waiver isn't signed, they're prompted with Sign waiver before they can check in.
- Walk-ins with no booking in their name can browse Happening at [your club] to claim a guest spot booked under their name or join an open event on the spot.
Every self check-in shows up in the Check-in panel on your Today page under Recently checked in, badged Self check-in.
If something goes wrong
- A customer says the QR won't scan — for a Dynamic QR, an old screenshot has expired by design; they need to scan the live tablet. Confirm the QR code is Enabled and the tablet is showing the current code.
- "QR code expired" on the customer's phone — the Dynamic code rotated between the scan and the tap. Ask them to scan the live display again.
- A customer's booking doesn't appear — they may have booked under a different email (they can sign out and back in), or the booking is outside the check-in window. A customer can't self-check-in before the window opens — if they're early and need to be in, the front desk can check them in by hand.
- A paid customer is still asked to pay — confirm the order is actually settled; unpaid court fees on OpenGame bookings count. If payment is collected at the desk, turn Require payment before check-in off.
- The QR type is greyed out — you're editing the built-in default QR, where the type is locked. Add a new QR code to pick a different type.
Related
Set up the QR scanner at your front desk
Plug in a USB or Bluetooth QR scanner, verify it with the built-in scanner test, and check customers in from any admin page — no configuration needed.
Check-in reasons and troubleshooting
Every result a scan can show — Needs attention reasons, waiver and payment states, statuses, and source badges — and what to do about each.