

Sending Emails to Event Participants
Admins can send a custom email directly to the participants of any event — a clinic, open play, tournament, or any other event type. This is useful for sharing last-minute updates or any message that applies specifically to the people in that event.
How to Send an Email
- Open the event from the admin events list
- Go to the Participants tab
- Click Send email to participants in the header area above the participants table
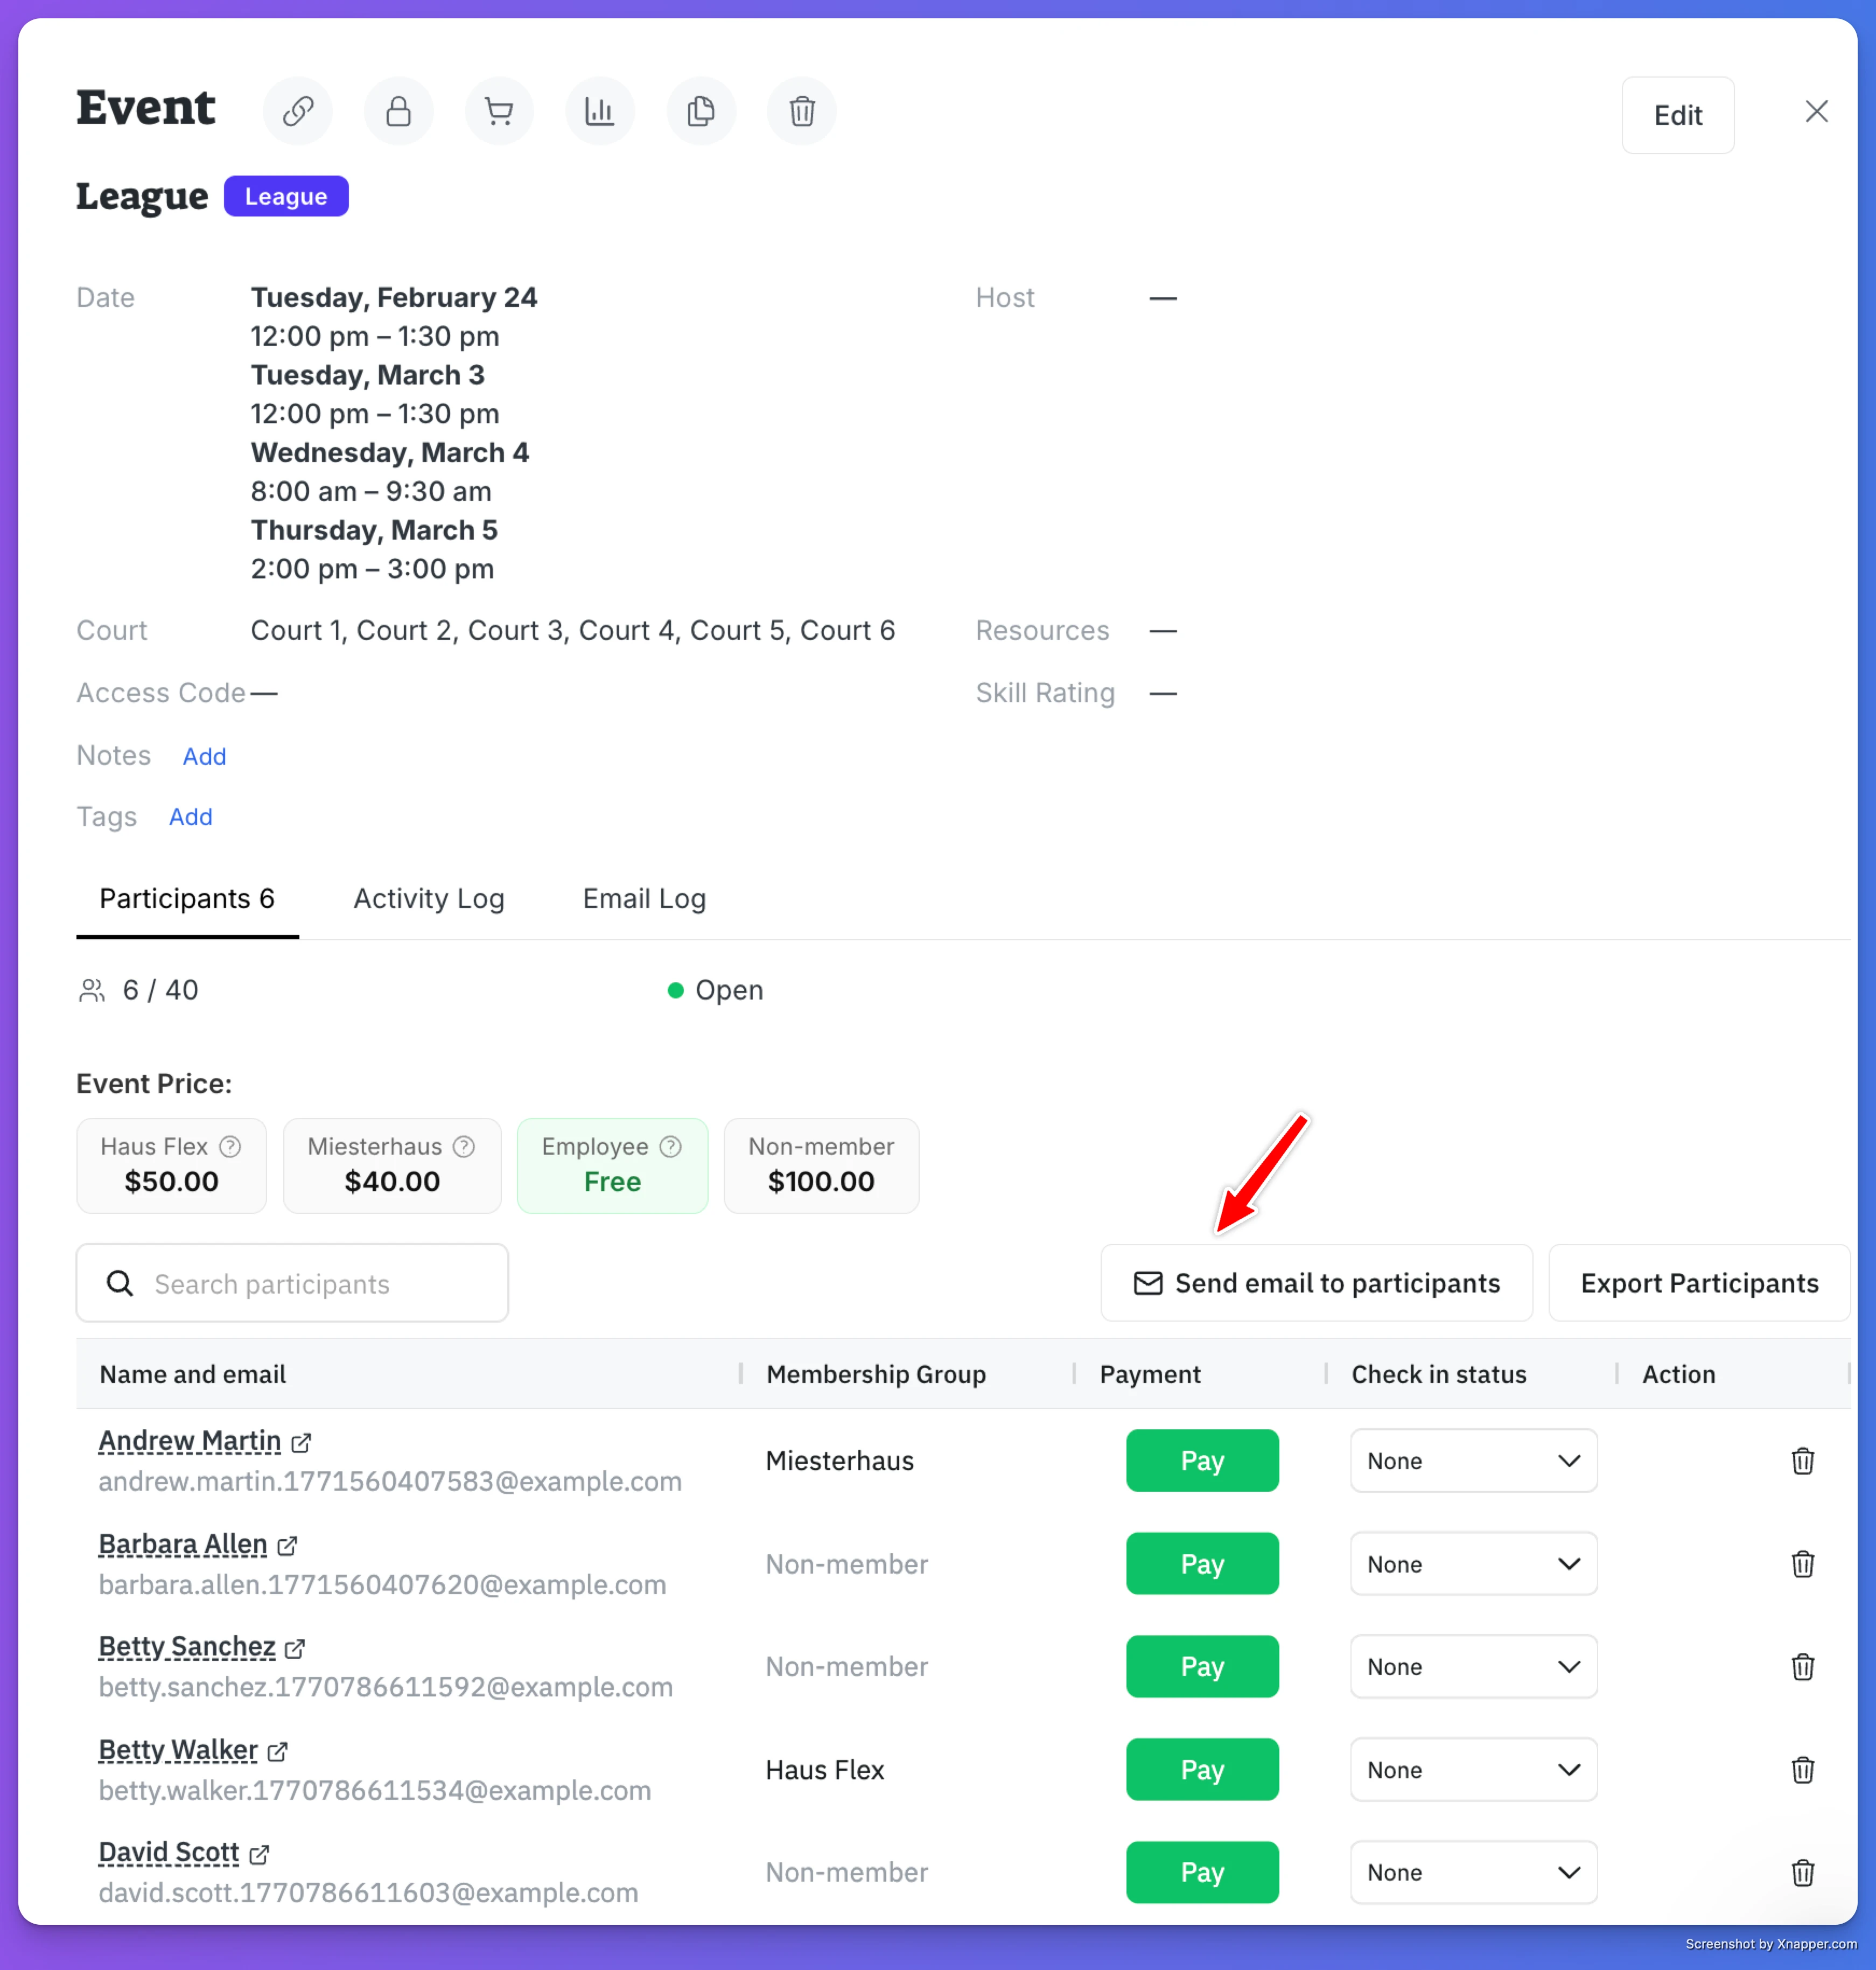
Step 1: Compose Your Message
The email popup opens with two sections:
Subject — Pre-filled as "[Event Name] — [Club Name]". This gives recipients immediate context about which event the email relates to.
Message — A rich text editor where you write your message.
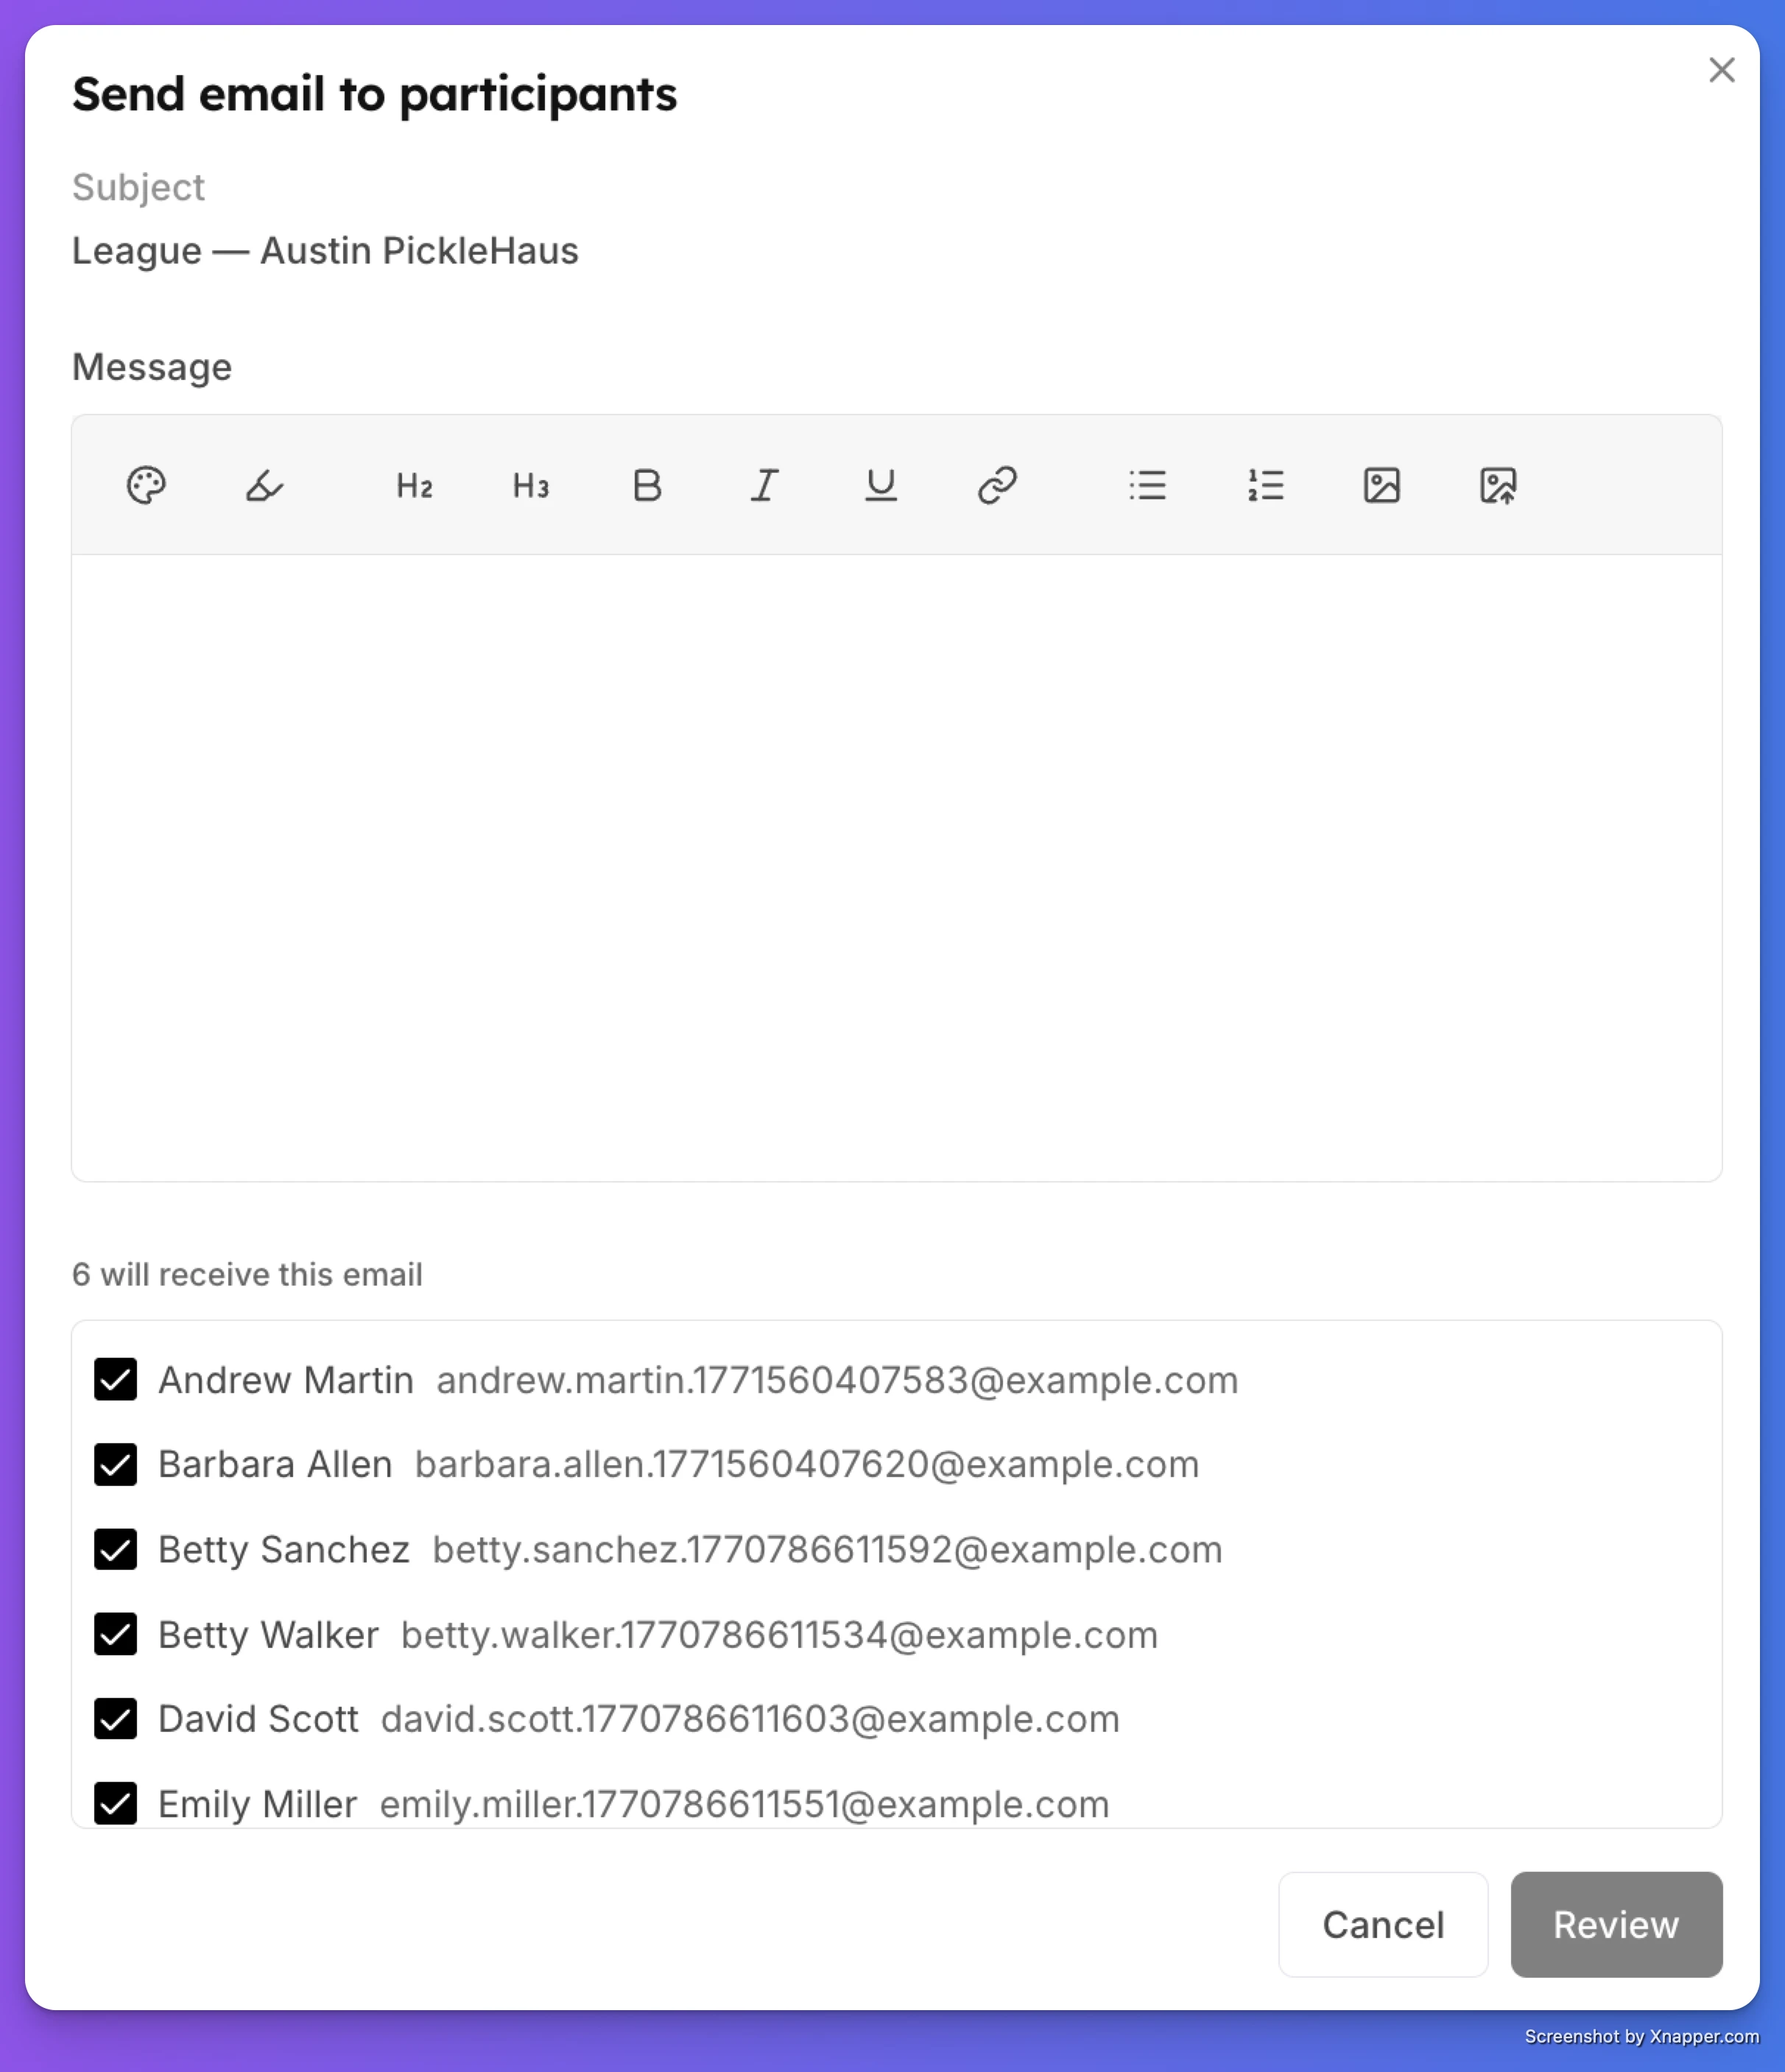
Step 2: Choose Recipients
Below the editor, you'll see a list of all recipients. By default, all confirmed participants and waitlisted members are selected. Each person has a checkbox — uncheck anyone you want to exclude from this email.
The label shows how many people will receive the email (e.g., "6 will receive this email").
Guests without user accounts are automatically excluded since they don't have email addresses in the system.
Step 3: Review
Click Review to see a preview of the email before sending. The review step shows:
- Email preview — How the email will look to recipients, including:
- An intro line: "You have an update from [Club Name] regarding your upcoming event"
- Your custom message in a left-bordered card
- An Event Details card with the event name, date/time, duration, and court/space assignment
- Recipient list — The final list of people who will receive the email, with names and email addresses
Step 4: Send
Click Send email to send. You'll see a confirmation toast:
- Success: "Email queued for X recipient(s)"
- Partial failure: "X email(s) queued. Y failed to enqueue." (if some addresses had issues)
- Full failure: Error message with details
Email Log
Every event has an Email Log tab in the event detail modal, right next to the Activity Log. This shows all emails related to this event — both admin-sent emails and automatic system notifications (reminders, confirmations, updates).
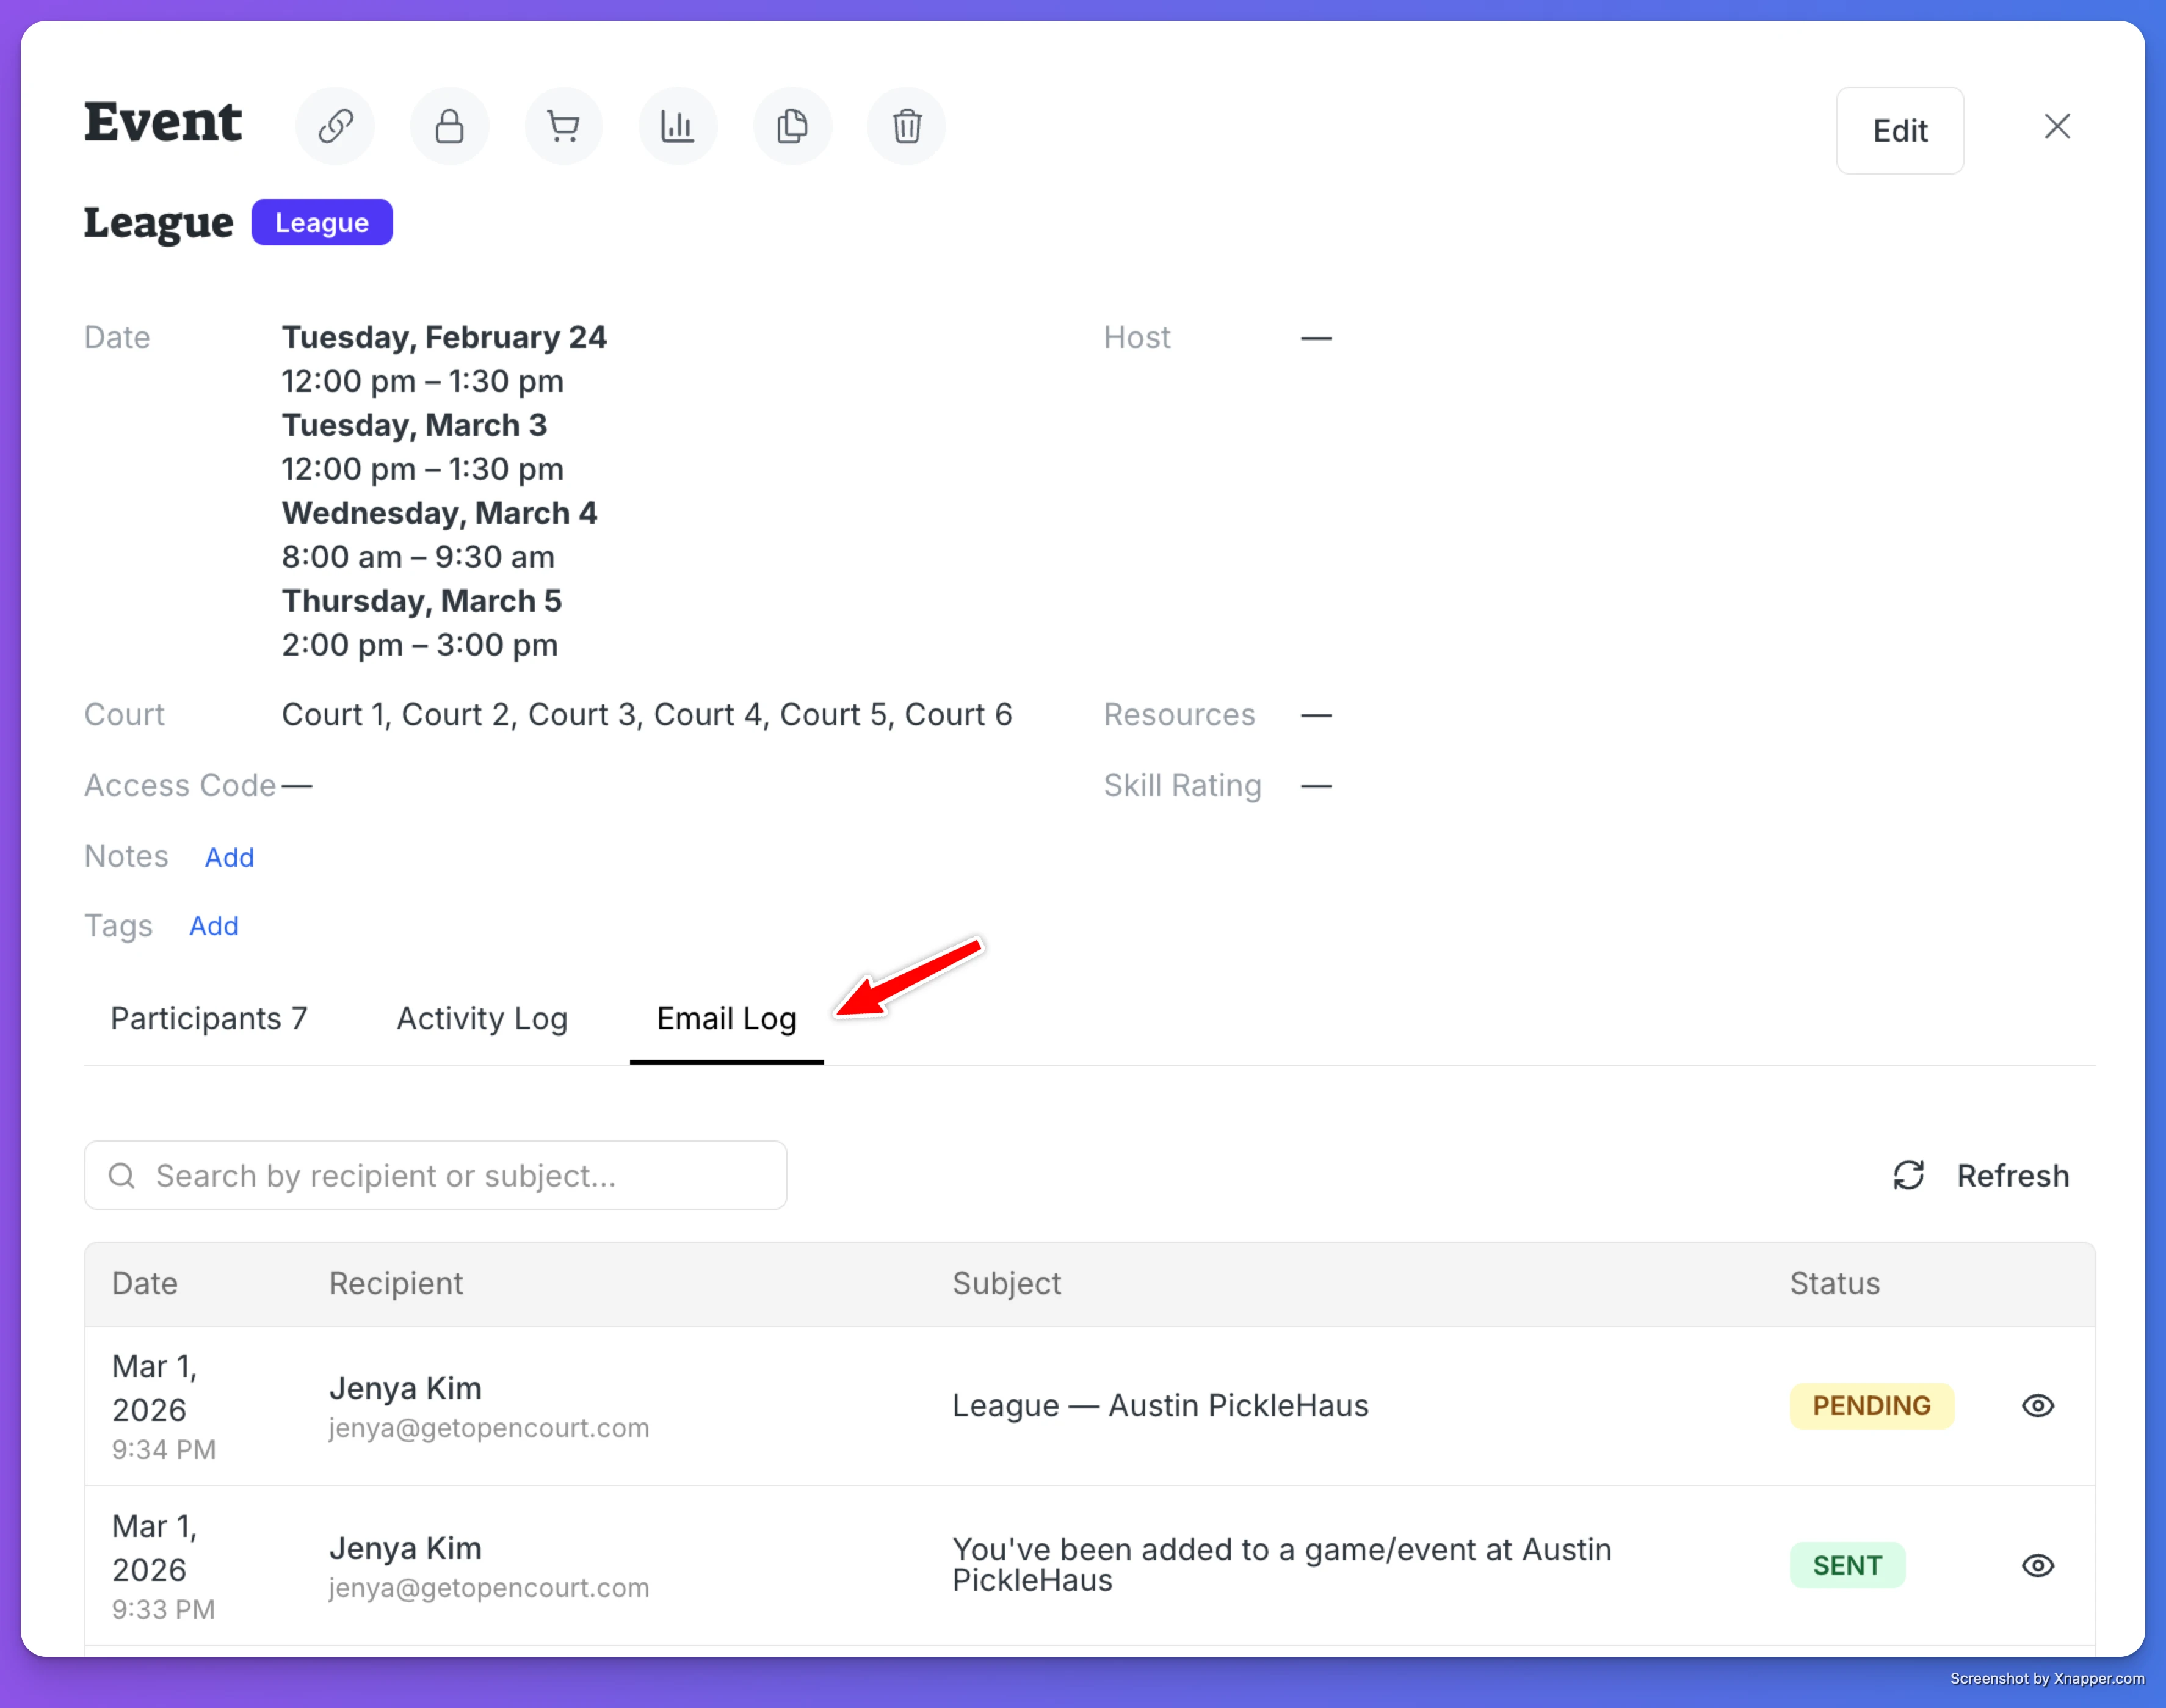
The Email Log table shows:
- Date — When the email was sent
- Recipient — Name and email address
- Subject — The email subject line
- Status — Sent (green), Pending (yellow), Failed (red), or Skipped (gray)
You can search by recipient name or subject, and click the eye icon on any row to preview the full rendered email.
Failed or skipped emails show the error reason in a tooltip when you hover over the status badge.
What the Email Looks Like
Recipients receive a branded email with:
- Header — Club branding
- Intro line — "You have an update from [Club Name] regarding your upcoming event."
- Your message — The custom content you wrote, displayed in a left-bordered card to visually distinguish it from the event details
- Event Details card — A gray card showing:
- Event name
- Date and time with duration (e.g., "Saturday, March 7 at 9:00 AM - 10:30 AM (1h 30m)")
- Court/space assignment (if applicable)
- Footer — Club name and OpenCourt branding
Where Else These Emails Appear
Admin-sent event emails are tracked across the platform:
| Location & What you see | |
|---|---|
| Event detail → Email Log tab | All emails for this specific event (admin-sent + system notifications) |
| Settings → Email History | Shows with the label "Admin: Event Email" alongside all other sent emails |
| User profile → Emails tab | Visible per-user when viewing a specific member's email history in the admin panel |
Tips
- Use it for time-sensitive updates — Court change, schedule shift, weather cancellation, parking info, or any detail that participants need to know before the event.
- Uncheck waitlisted members if the update only applies to confirmed participants (e.g., court assignments).
- Check the Email Log after sending to verify delivery. If any emails failed, you can see the error reason by hovering over the red status badge.
- No setup required — Unlike Email Campaigns, this feature works out of the box. It uses the platform's transactional email stream, so there's no club-level email configuration needed.
Event Reminders
The Event Reminders feature helps clubs reduce no-shows by automatically sending reminders to participants before an event starts. You can configure reminders by event type (for example, leagues, tournaments, clinics) or customize them for individual events. This is especially useful for events people sign up for well in advance—such as leagues or tournaments—where reminders help ensure players don’t forget to attend.
Resources (Ball Machines, Equipment & More)
Resources are bookable items at your club that members can add to their court reservations — ball machines, pitching machines, or any other equipment that needs to be reserved for a specific time slot. When a member books a court, they can optionally add a resource to their reservation. The system tracks availability so two people can't book the same ball machine at the same time, and handles pricing automatically.